
My first blog post. A little background I guess. I am a mom, wife, artist, wanna-be teacher, and lover of nature and all things naturally made. I started my garden for many reasons: to be creative, to grow my own food, to make meals and store food for the winter months (or the apocalypse, whichever comes first) ;-). This year winter is upon us and I didn’t get the biggest harvest so I will stick to ordering my fruits and vegetables from Klesick Farms. They rock. It is fun and easy to order food online and have it delivered right to the front door. I still need to learn all about canning and storing food but that is for another day.

Today I want to go over what I have done so far. This is how I plan to blog, going over what I have done. I started planning and designing my garden in January 2016, in the cold winter months while listening to my husband play guitar. I read, pinned, and created what I wanted to do. I like to use the yellow legal pads to keep all the ideas and information all in one place. It is my old school blog if you will.
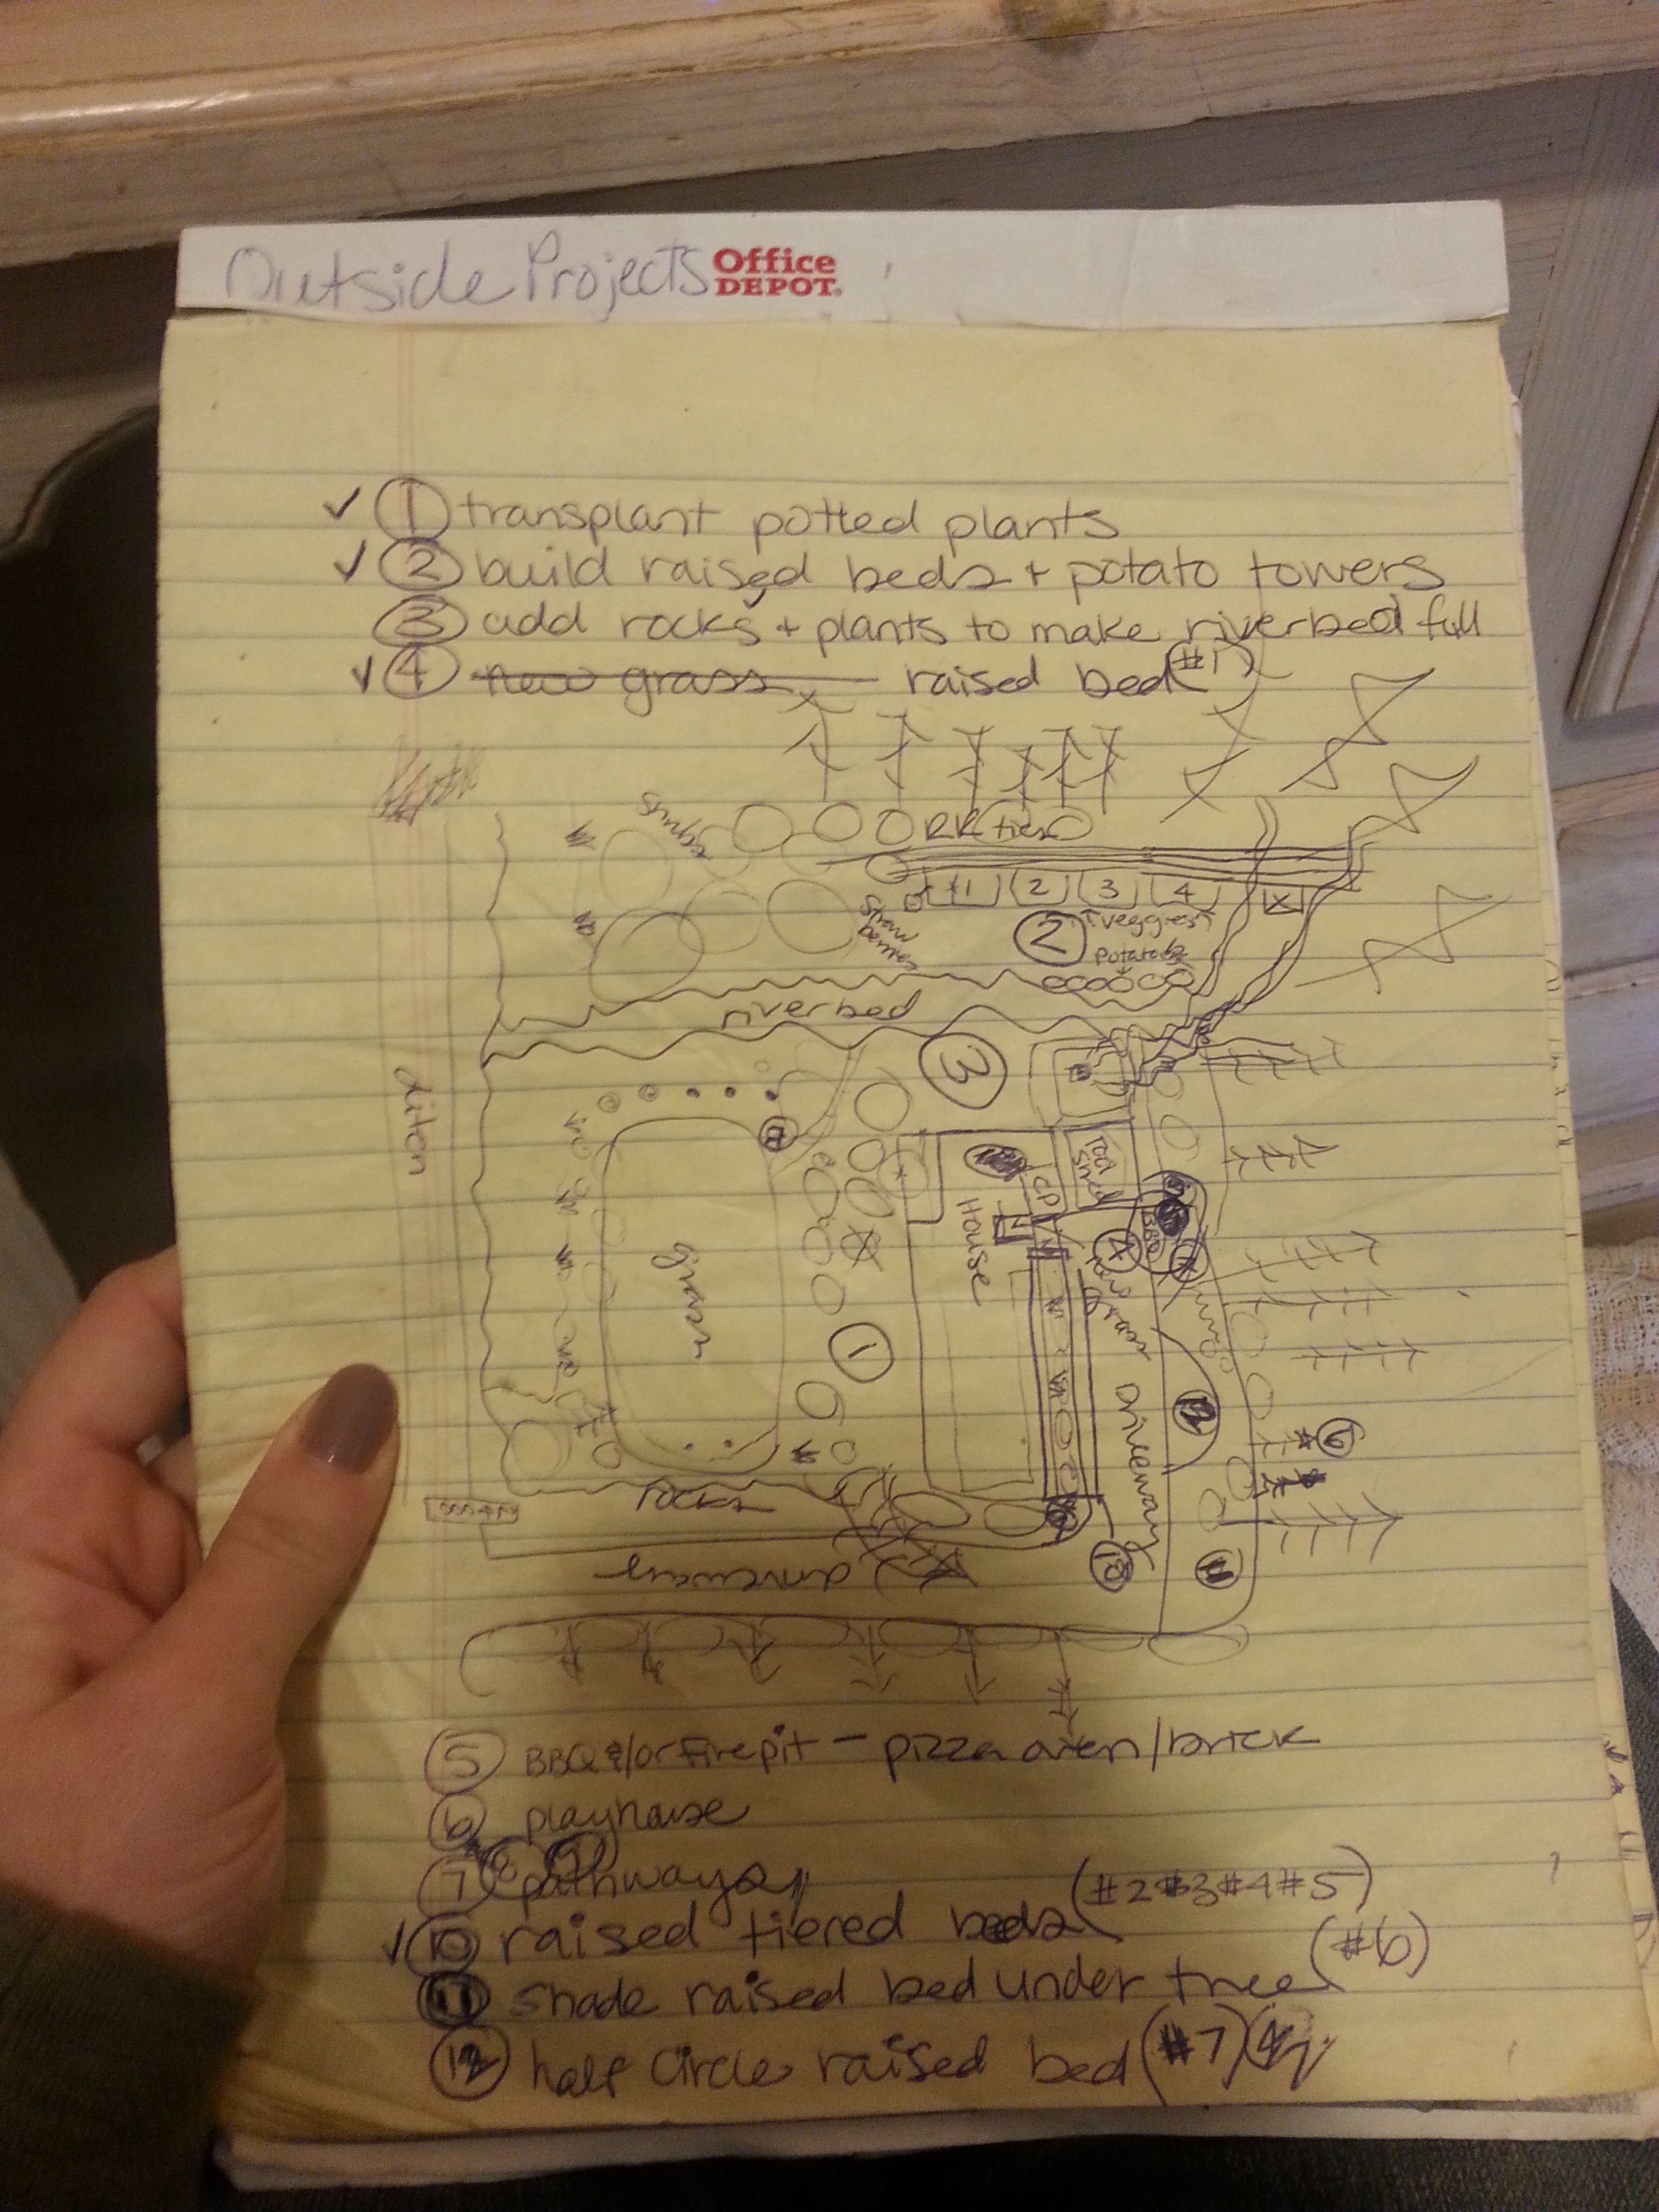
Once I had all the plans drawn out and measurements estimated. I bought the supplies from local stores, I like to keep it as local as possible with all my purchases. Vote with your dollars is a good motto of mine. I want to support local companies, employees, and taxes to support the town I live in. I ordered seeds from Osborne Seed Co., soil delivered from Salazar’s Nursery, bought wood at Sound Cedar, screws from Kaptein’s Ace Hardware, had Ollas made by Sauk Mountain Pottery, and collected tools from garage sales or the local pawn shop. With all the supplies in hand then it was time to start moving plants and building the raised beds.
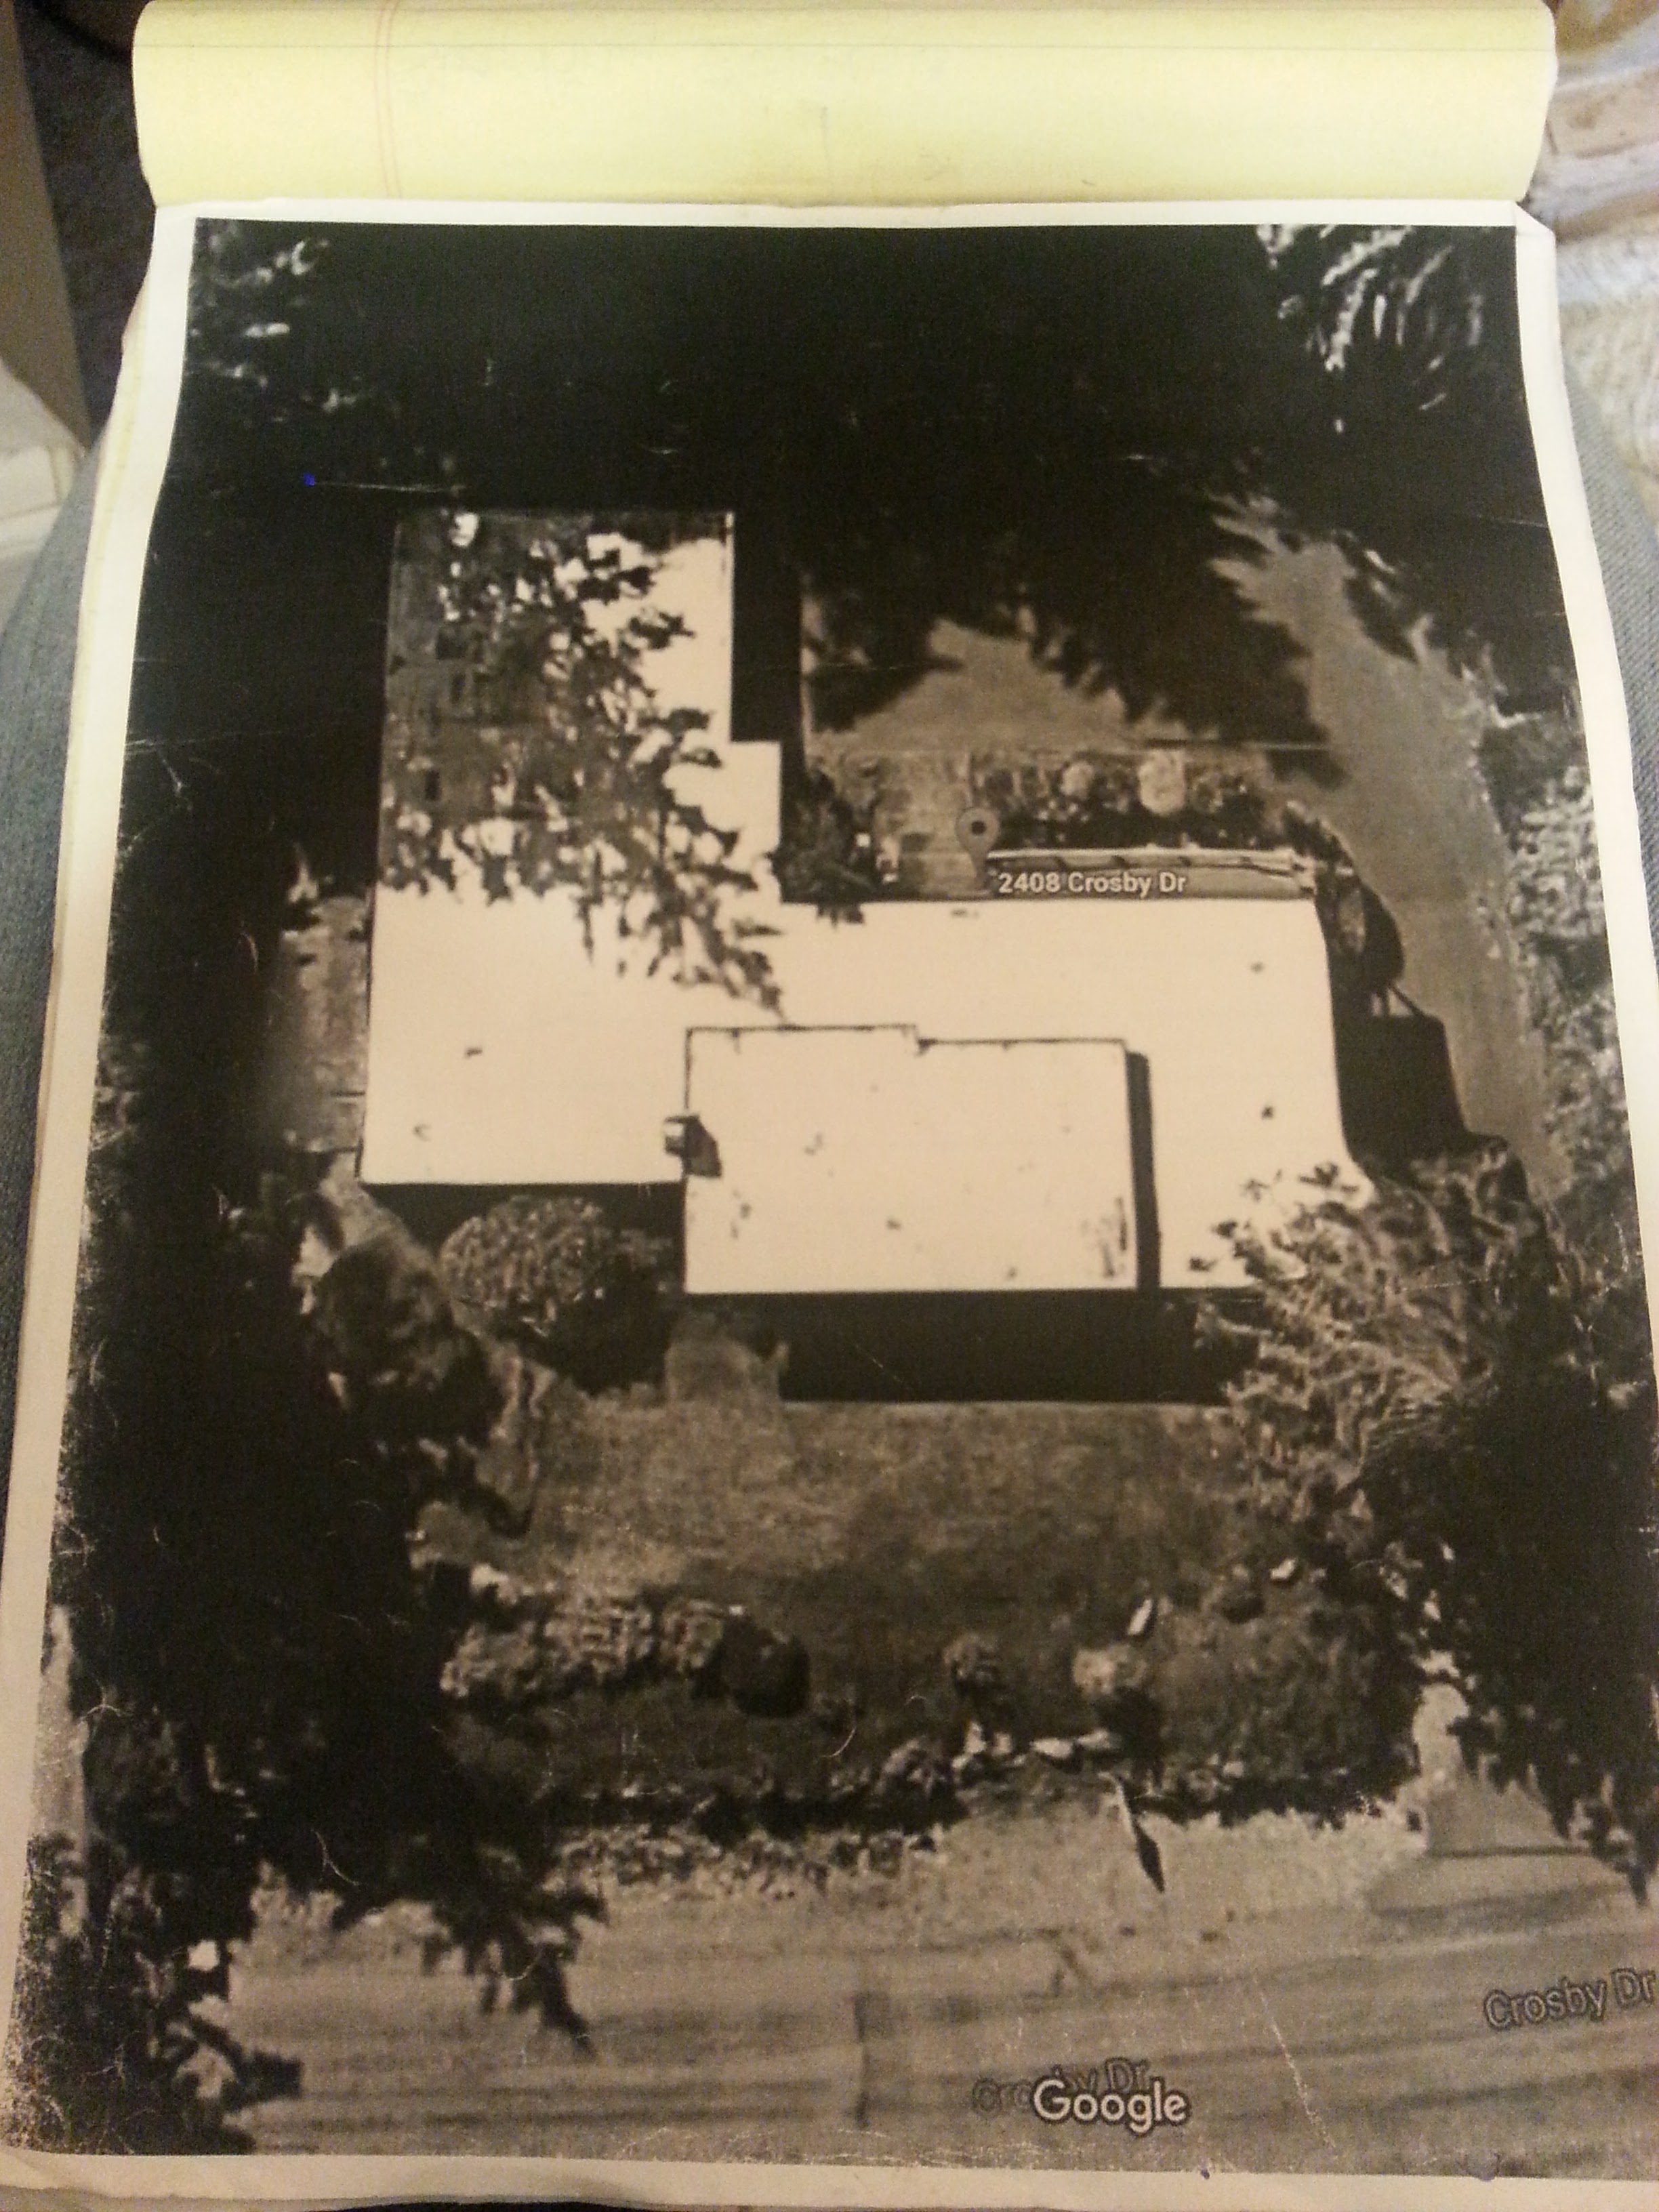
The location of the beds was planned from the aerial photo from Google maps. The image showed the sunniest spots and it was also where we hang out the most, right outside the front door.
The first step was getting help moving the shrubs to the front yard. The guys from Alison Yard Maintenance (they rock too!) did that part. Thank goodness because that was a lot of heavy moving and digging and I was saving energy for the rest (hindsight is so much clearer). With the design in mind and a rough sketch to go by, the fun began. My hubby showed me how to use the tools and helped when I needed help moving the really long boards or needed help designing when it was not on paper. He helped me along the way but I was determined to do it and help is hard to ask for sometimes. I appreciate all the help that’s for sure.
The photos I took along the way will show the step by step process of building the beds, adding the filler (Hugelkultur is the method I followed and modified), adding in the soil and ollas, growing the seeds, adding the starts to the beds, and finally harvesting and getting the beds ready to sleep for the winter. I will add descriptions along the way to explain what I was doing to accomplish this seasons harvest. This first growing season was an experimental phase. One of many experiments I presume as growing food goes outdoors in the Pacific Northwest. I love the area we live in and wouldn’t trade it for anything. I may run out of growing space if I get really good at it but I can always expand to new areas of the yard. For now I want to make the most out of the spaces I have and eventually grow food year round and can the fruits of my labor. All a labor of love.